Setting up a Laravel development environment can be time-consuming, especially when you have to install and configure PHP, Nginx, and Valet manually. Laravel Herd changes that by offering a lightning-fast, ready-to-use local development environment for Laravel, specifically designed for macOS.
In this guide, you’ll learn:
✅ What Laravel Herd is
✅ How to install and set it up
✅ How to create and run Laravel projects with Herd
What is Laravel Herd?
Laravel Herd is a native macOS application that bundles everything you need to run Laravel instantly. It manages PHP, Nginx, and DNSMasq behind the scenes, so you can focus on development instead of configuration.
Key Features
- 🚀 Blazing fast – Starts instantly with zero manual setup.
- 🐘 Multiple PHP versions – Switch between PHP versions with a single click.
- 🔄 Automatic Valet integration – Built on top of Valet, but completely managed for you.
- 🖥️ User-friendly GUI – No terminal knowledge required.
Step 1: Installing Laravel Herd
- Download Laravel Herd
Go to https://herd.laravel.com and download the.dmgfile. - Install the Application
- Drag and drop Laravel Herd into your Applications folder.
- Open it; macOS may ask for permission.
- Grant Required Permissions
- Herd will request permission to configure DNS and networking.
- Enter your macOS password when prompted.
- Launch Herd
Once installed, you’ll see the Herd icon in your macOS menu bar.
Step 2: Setting Up Laravel Herd
- Automatic Valet Configuration
- Herd automatically installs and configures Valet and Nginx for you—no manual steps required.
- Default Sites Directory
- By default, Herd uses the
~/Herdfolder to serve your projects. - You can change this folder from the preferences.
- By default, Herd uses the
- Serving Your Projects
- Place any Laravel project inside the Herd folder.
- It will be automatically accessible at:
http://your-project-name.test
- Switching PHP Versions
- Go to Herd menu → PHP → Select version.
- Useful if you work with different Laravel versions that require different PHP versions.
Step 3: Creating a New Laravel Project
You can create a Laravel project directly in the Herd folder.
Using the Terminal
- Open your terminal and navigate to the Herd folder:
cd ~/Herd laravel new blog - Once installed, visit:
http://blog.test
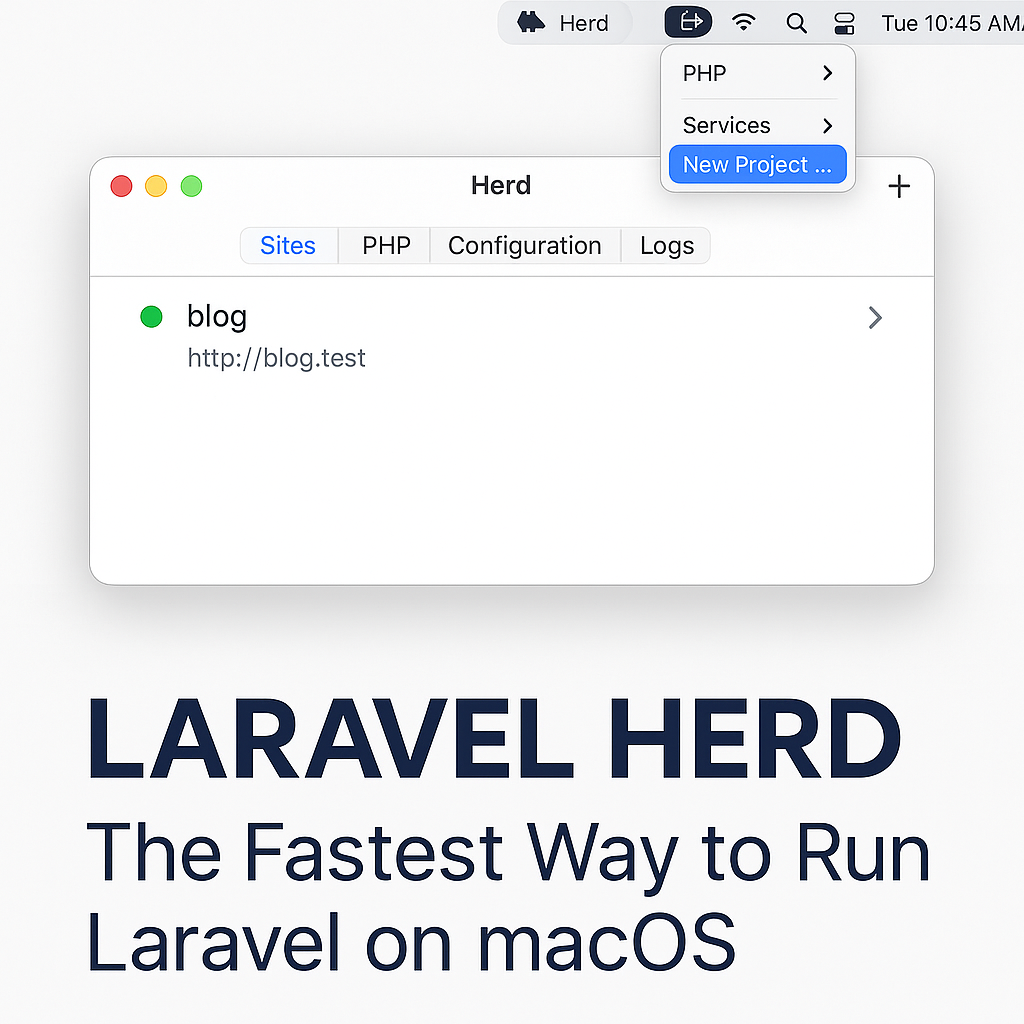
Using Laravel Herd’s GUI
- Click the “New Project” button in the Herd menu.
- Choose your project folder and Laravel version, and Herd will handle everything for you.
Step 4: Useful Tips
- Share Your Site – Use
valet share(powered by ngrok) to share your local Laravel app with others. - View Logs Easily – Check PHP and Valet logs directly from the Herd menu.
- Multiple PHP Projects – Herd automatically selects the correct PHP version if your project has a
.valetphprcfile.
Conclusion
Laravel Herd is the quickest and simplest way to develop Laravel applications on macOS. Whether you are just starting with Laravel or are an experienced developer, Herd saves you time and effort by handling all the background configuration for you.
If you’re a macOS user, installing Herd should be your first step before starting any new Laravel project.